

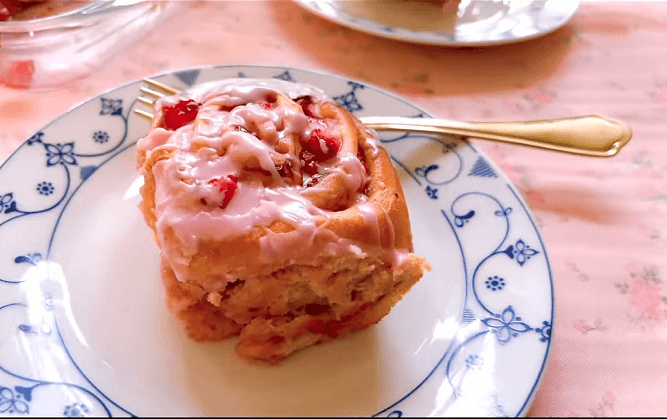
Hey friends, gather around! I’m excited to share my Strawberry Cinnamon Rolls Recipe with you. Picture this: soft, pillowy dough swirled with a vibrant strawberry filling, topped with a dreamy cream cheese glaze. It’s the perfect treat for a cozy brunch or a sweet dessert hangout.
I’ve been tweaking this recipe for years, pulling inspiration from my favorite baking blogs and my own kitchen experiments. These rolls are a fun twist on classic cinnamon rolls, bursting with fresh strawberry flavor. Let’s dive into how I make these gooey, irresistible treats!
Why I Love These Strawberry Cinnamon Rolls
These rolls are my go-to for special mornings. The strawberry filling adds a fruity zing that pairs perfectly with warm cinnamon. They’re easier than they look, and the tangzhong method keeps them fluffy for days. Perfect for impressing your crew without slaving away all day!
I first made these for a family brunch, and they were gone in minutes. The combo of jammy strawberries and tangy glaze is a crowd-pleaser. You can even prep them the night before for stress-free baking. Trust me, your kitchen will smell like a bakery!

Ingredients for the Perfect Rolls
Here’s what you’ll need for the dough, filling, and glaze. I’ve included prep tips to make your life easier. Fresh ingredients make all the difference here!
Dough Ingredients
- Whole Milk (¾ cup, warmed to 110°F): Warm it gently in a microwave or on the stove. It activates the yeast perfectly. Don’t let it get too hot!
- Bread Flour (3 ½ cups): This gives the rolls structure and chewiness. Measure accurately with a kitchen scale. All-purpose works, but bread flour is best.
- Granulated Sugar (⅓ cup): Feeds the yeast and adds a touch of sweetness. Use white sugar for a clean flavor. Mix it evenly into the dry ingredients.
- Instant Yeast (2 ¼ tsp): No need to bloom; just mix it in. Check the expiration date for a good rise. Active dry yeast works if you bloom it first.
- Salt (¾ tsp): Balances the sweetness and enhances flavor. Use fine sea salt for even distribution. Don’t skip this!
- Large Egg (1, room temperature): Adds richness and binds the dough. Let it sit out for 30 minutes. Crack it into a small bowl first.
- Unsalted Butter (4 tbsp, softened): Makes the dough tender and buttery. Cut into small pieces for easy mixing. Room temperature is key.
- Tangzhong (¼ cup flour + ¾ cup water): Cook into a thick paste for ultra-soft dough. Whisk constantly to avoid lumps. Cool before using.
Strawberry Filling Ingredients
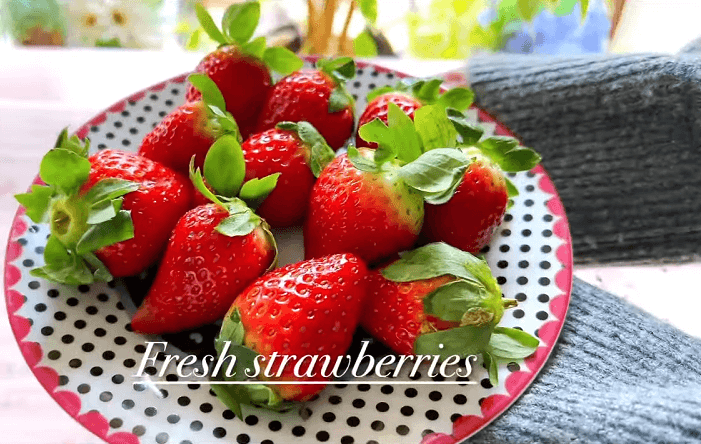
- Fresh Strawberries (2 cups, chopped): Hull and dice for a vibrant filling. Use frozen if out of season, no thawing needed. Pick bright, ripe berries.
- Brown Sugar (3 tbsp): Adds caramel-like sweetness. Pack it tightly for accurate measurement. Mixes beautifully with strawberries.
- Lemon Juice (2 tsp): Brightens the fruit’s flavor. Freshly squeezed is best. A little goes a long way.
- Cornstarch (1 tbsp): Thickens the filling to prevent leaks. Mix with water for a smooth slurry. Stir it in slowly.
- Water (2 tbsp): Used for the cornstarch slurry. Keep it cold for best results. Ensures a jam-like consistency.
- Ground Cinnamon (½ tsp): Warm spice to complement strawberries. Use fresh for bold flavor. Sprinkle evenly over the filling.
Cream Cheese Glaze Ingredients
- Cream Cheese (4 oz, softened): Creates a rich, tangy glaze. Leave it out for 30 minutes to soften. Full-fat works best.
- Unsalted Butter (2 tbsp, softened): Adds smoothness to the glaze. Soften alongside the cream cheese. Don’t melt it!
- Powdered Sugar (1 cup): Sweetens and thickens the glaze. Sift to avoid lumps. Adjust for desired consistency.
- Reserved Strawberry Filling (2 tbsp): Infuses the glaze with berry flavor. Save it from the filling prep. Adds a gorgeous pink hue.
- Milk (1-2 tbsp): Thins the glaze to a spreadable texture. Add gradually to avoid runny icing. Whole milk is ideal.
Tools You’ll Need
You don’t need fancy gear, but these make the process smooth. A stand mixer with a dough hook saves time. Grab a 9×13-inch baking pan, rolling pin, and dental floss for clean cuts. A kitchen scale and thermometer ensure precision.
I also love using parchment paper for easy cleanup. A medium saucepan is perfect for the filling. Keep a cooling rack handy for the final touch. These tools make baking a breeze!
Step-by-Step: Crafting Your Strawberry Cinnamon Rolls
Let’s get baking! I’ll walk you through each step. Follow along, and you’ll have perfect rolls in no time.
Step 1: Make the Tangzhong
I start with the tangzhong for super-soft dough. Whisk ¼ cup flour and ¾ cup water in a small saucepan over medium heat. Stir until it forms a thick paste, about 4-5 minutes. Let it cool completely.
This paste is my secret for fluffy rolls. It locks in moisture like nothing else. Don’t skip this step! Set it aside while you prep the filling.
Step 2: Cook the Strawberry Filling
Chop 2 cups of strawberries and toss them in a saucepan with brown sugar and lemon juice. Cook over medium heat, stirring until the berries break down, about 10 minutes. Mix cornstarch with water, stir it in, and cook until thick, like jam. Reserve 2 tablespoons for the glaze and cool the rest.
This filling is the star of the Strawberry Cinnamon Rolls Recipe. It’s sweet, tangy, and just sticky enough. Cooling it prevents a soggy dough. Trust me, patience pays off here.
Step 3: Mix the Dough
In a stand mixer, combine flour, sugar, yeast, and salt. Add warm milk, egg, vanilla, and cooled tangzhong. Mix with the dough hook until a shaggy dough forms. Knead on medium speed for 2 minutes.
The dough should feel soft and slightly sticky. If it’s too wet, add a tablespoon of flour. This step sets the foundation for fluffy rolls. Keep an eye on the texture!
Step 4: Add Butter and Knead
Gradually add softened butter, one tablespoon at a time. Knead for 8-10 minutes until smooth and elastic. Do the windowpane test: stretch a small piece to see if it’s thin and translucent. If it tears, knead longer.
This is where the dough gets its buttery richness. Don’t rush the butter incorporation. It’s worth the extra minute. Your rolls will thank you!
Step 5: First Rise
Shape the dough into a ball and place it in a greased bowl. Cover with plastic wrap and let it rise in a warm spot for 1-2 hours, until doubled. I pop mine in an oven with the light on. Check for a poke test: it should spring back slowly.
This rise is crucial for airy rolls. A warm, draft-free spot is key. Don’t rush it—good things take time. You’ll see the dough puff up beautifully.
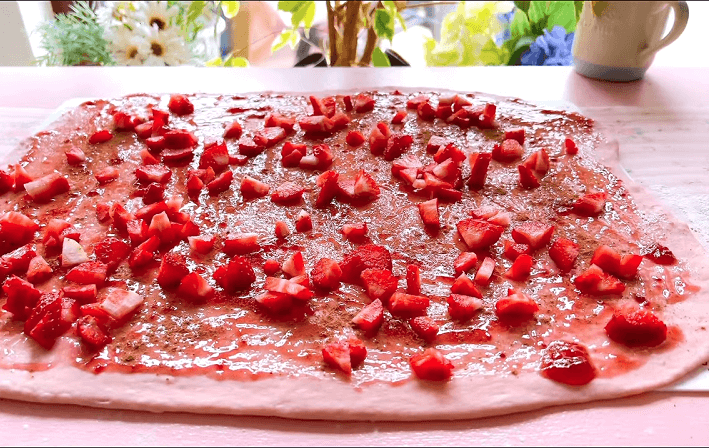
Step 6: Roll and Fill
Punch down the dough and roll it into a 15×10-inch rectangle on a floured surface. Spread the cooled strawberry filling evenly, leaving a ½-inch border. Sprinkle cinnamon over the top. Roll tightly from the long edge into a log.
Keep the roll snug but not too tight. This prevents the filling from oozing out. The cinnamon adds warmth to the strawberry flavor. You’re almost there!
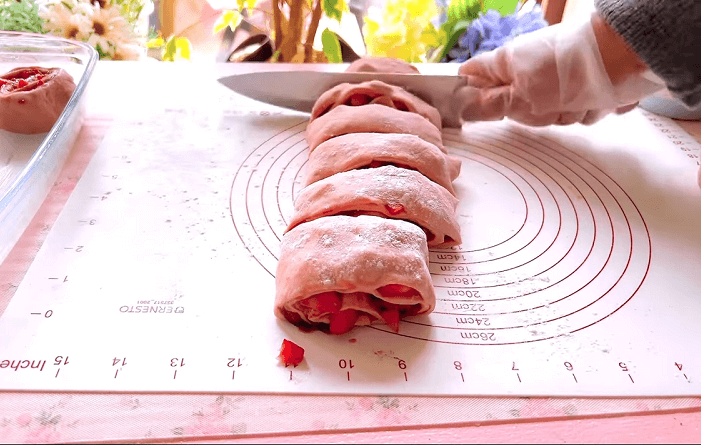
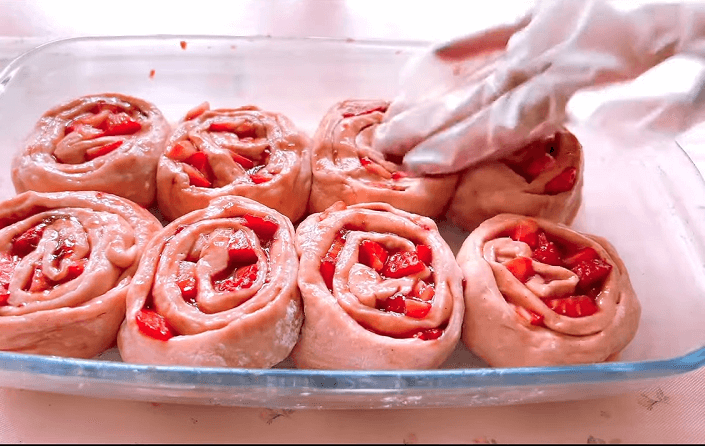
Step 7: Cut and Shape
Use unflavored dental floss to cut the log into 12 equal pieces. Slide the floss under, cross it over, and pull for clean slices. Place the rolls in a greased 9×13-inch pan, leaving space between them. Cover and let rise for 45 minutes until puffy.
Dental floss is my go-to for perfect cuts. It doesn’t squish the dough like a knife. The second rise makes them extra fluffy. Your kitchen will start smelling amazing!
Step 8: Bake to Golden Perfection
Preheat the oven to 375°F. Brush the rolls with cream for a golden crust. Bake for 20-25 minutes until golden brown and 190°F internally. Tent with foil if they brown too quickly.
Check doneness with a thermometer for accuracy. The rolls should be soft but fully baked. Let them cool slightly before icing. The aroma is unreal!
Step 9: Whip Up the Glaze
Beat cream cheese and butter until smooth. Gradually add powdered sugar, then mix in reserved strawberry filling and milk. Adjust milk for a spreadable consistency. Spread over warm rolls for a melty finish.
This glaze is what makes these rolls next-level. The strawberry infusion ties everything together. Don’t skimp on the cream cheese—it’s divine!
Tips for Bakery-Worthy Rolls
Weigh ingredients in grams for precision. A kitchen scale is your best friend. Ensure your yeast is fresh to avoid flat rolls. If it doesn’t foam, start over.
Cool the filling completely before spreading. Warm filling makes the dough soggy. Roll tightly but gently to keep the filling in place. Dental floss is a game-changer for clean cuts.
Don’t overbake—check at 20 minutes. Golden tops and a soft center are perfect. Let the rolls cool slightly before glazing for the best texture. These tricks make all the difference!
Serving Ideas for Every Occasion
These rolls shine at brunch with coffee or orange juice. Pair them with crispy bacon for a savory balance. For dessert, add a scoop of vanilla ice cream. They’re also great for holidays like Valentine’s Day or Easter.
I love serving them warm with extra glaze on the side. Kids go wild for them with chocolate milk. For a crowd, cut into smaller pieces for easy sharing. They’re always a hit!
Storing and Make-Ahead Tips
Store leftover rolls in an airtight container in the fridge for up to 5 days. Reheat in the microwave for 15-20 seconds. Freeze unbaked rolls after cutting, then thaw and rise before baking. Baked rolls freeze well for up to 2 months—add glaze after reheating.
I often prep the dough overnight for fresh morning rolls. Refrigerate after the first rise, then let it come to room temperature. This saves time without sacrificing flavor. Perfect for lazy weekends!
Variations to Mix It Up
Try raspberries or blueberries for a different berry vibe. Swap cream cheese glaze for a simple vanilla icing. Add chopped pecans for crunch. For a sourdough twist, use an active starter and extend the rise time.
I’ve experimented with lemon zest in the filling for extra zing. Gluten-free flour blends work for dietary needs. These variations keep things fresh. Get creative and make it your own!
Why This Recipe Stands Out
This Strawberry Cinnamon Rolls Recipe is my pride and joy. The tangzhong method ensures soft, lasting texture. Fresh strawberries and cinnamon create a perfect flavor balance. It’s beginner-friendly yet impressive enough for pros.
I’ve baked these for countless gatherings, and they always steal the show. The glaze’s pink hue screams Instagram-worthy. You don’t need to be a master chef to nail this. It’s all about simple techniques done right.
Frequently Asked Questions
Can I use frozen strawberries?
Yes, frozen strawberries work great. Don’t thaw them—just cook as directed. They create a jammy filling.
How do I know if my dough is ready?
Do the windowpane test. Stretch a small piece; it should be thin and translucent. If it tears, knead more.
Can I make these ahead of time?
Absolutely! Prep the rolls, refrigerate overnight, then let them rise before baking. Fresh rolls, no early wake-up!
What if my yeast doesn’t foam?
Your yeast might be expired, or the milk was too hot. Use fresh yeast and milk at 110°F. Try again.
How do I store leftovers?
Keep in an airtight container in the fridge for 5 days. Reheat briefly for that fresh-baked vibe. Freeze for longer storage.

Strawberry Cinnamon Rolls Recipe
Ingredients
- ½ cup all-purpose flour
- ¼ tsp baking powder
- 1 tbsp sugar
- Pinch of salt
- 2 tbsp milk
- 1 tbsp melted butter
- 2 strawberries, chopped
- 1 tbsp brown sugar
- ½ tsp cinnamon
- 1 tbsp cream cheese (for frosting)
- 1 tbsp powdered sugar (for frosting)
- ½ tsp milk (for frosting)
Notes
- Preheat oven to 350°F (175°C).
- Mix flour, baking powder, sugar, and salt. Add milk and butter; knead lightly into a dough.
- Roll dough into a small rectangle.
- Sprinkle cinnamon, brown sugar, and chopped strawberries over the dough.
- Roll up gently and place in a greased ramekin or small baking dish.
- Bake for 15 minutes or until golden.
- For frosting, mix cream cheese, powdered sugar, and milk until smooth.
- Drizzle frosting over warm roll and enjoy!

Hello! I am a seasoned culinary veteran whose passion for cooking began in my family kitchen and later I explored global cuisines. Now as a owner of the "OhMyRecipe" blog, I share my expertise by blending classic techniques with innovative twists. I advocates for culinary education and community engagement, making cooking accessible and enjoyable for all. Join me on a flavor-filled journey of delicious dishes and culinary inspiration.