
Hey friends, gather around! I’ve got a fun twist on a classic that I’ve been perfecting in my kitchen: Grilled Cheese Roll-Ups. These crispy, cheesy bites are perfect for dipping and sharing. Let me walk you through how I make them, from picking the right ingredients to getting that golden crust just right.
Why I Love These Roll-Ups
I first stumbled across this idea on a late-night scroll through social media. The idea of rolling up a grilled cheese sandwich intrigued me. It’s portable, dippable, and a total crowd-pleaser. Kids and adults alike go crazy for these at my gatherings.
They’re quick to whip up, too. With just a few ingredients, I can have a batch ready in under 15 minutes. Plus, they’re versatile—perfect as a snack, lunch, or even a party appetizer. I love pairing them with a bowl of tomato soup for that ultimate comfort food vibe.
The best part? You can get creative. I’ve experimented with different cheeses and add-ins like bacon or tomatoes. It’s like a blank canvas for flavor, and I’m excited to share my favorite version with you.
Grilled Cheese Roll-Ups Recipe
Ingredients You’ll Need
Here’s what I use to make these Grilled Cheese Roll-Ups. Each ingredient plays a key role, so let’s break it down.
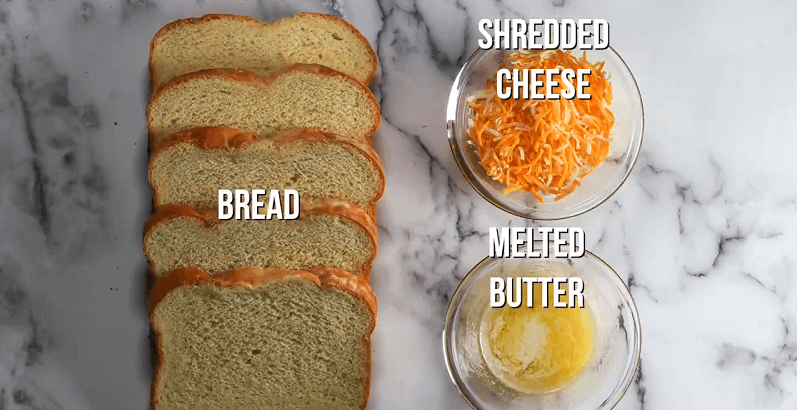
- White Sandwich Bread (8 slices): I choose soft, fresh white bread for easy rolling. Trim the crusts off to make it pliable. Save those crusts for homemade breadcrumbs later.
- Cheddar Cheese (8 slices or 1 cup shredded): Sharp cheddar gives a bold, melty flavor. Slice it thinly for even coverage or shred it for a gooey texture. I prefer slices for less mess when rolling.
- Butter (4 tablespoons, melted): Salted butter adds richness and helps achieve that crispy, golden exterior. Melt it slowly to brush evenly over the rolls. It’s the key to that classic grilled cheese taste.
- Optional: Deli Turkey or Bacon (4 slices): For extra protein, I sometimes add thin slices of turkey or pre-cooked bacon. Cook bacon until just done, not crispy, for easier rolling. It adds a smoky, savory kick.
Tools for the Job
I keep it simple in my kitchen. You’ll need a rolling pin to flatten the bread. A sharp knife is handy for trimming crusts. A non-stick skillet and tongs are must-haves for even cooking.
If you’re feeling fancy, an air fryer works great too. I use my Instant Vortex Plus for a crispier finish. A pastry brush helps spread butter evenly. Toothpicks can secure the rolls if they’re stubborn.
Step-by-Step: How I Make Grilled Cheese Roll-Ups
Let me take you through my process. It’s straightforward, but a few tricks make all the difference. Follow along, and you’ll be rolling like a pro.
Step 1: Prep the Bread
I start by trimming the crusts off each bread slice. This makes the bread easier to roll without cracking. Then, I use a rolling pin to flatten each slice to about 1/8-inch thick. It should feel soft and pliable, almost like dough.
Step 2: Add the Cheese
I lay a slice of cheddar (or about 2 tablespoons of shredded) on each flattened piece. I leave a small strip at one end bare to help seal the roll. If I’m adding turkey or bacon, I place it on top of the cheese now. It’s all about layering for even flavor.
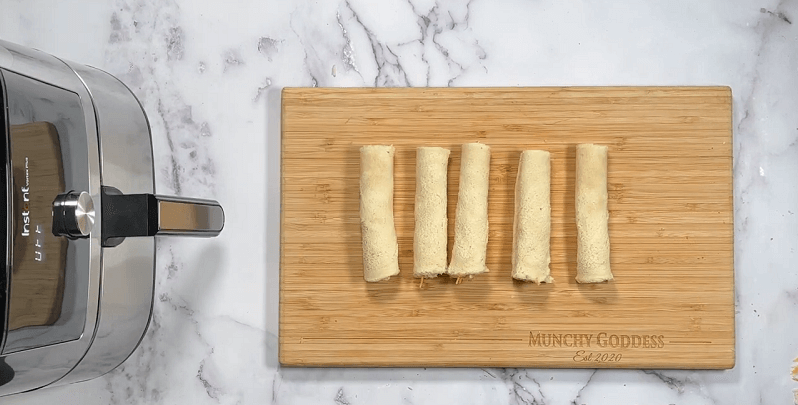
Step 3: Roll ‘Em Up
I roll each slice tightly, starting from the cheese-covered end. The bare strip at the end helps seal the roll. I press gently to keep it tight and secure with a toothpick if needed. Seam-side down is key when cooking to prevent unraveling.
Step 4: Brush with Butter
I melt my butter in a small bowl and brush it generously over each roll. This ensures a crispy, golden crust all around. Don’t skimp here—it’s what makes these rolls irresistible. I sometimes add a pinch of garlic powder to the butter for extra flavor.
Step 5: Cook to Perfection
I heat a non-stick skillet over medium-low heat. I place the rolls seam-side down first to seal them. Using tongs, I rotate them every minute or so until all sides are golden and the cheese is melty, about 3-4 minutes total. Low heat prevents burning and ensures even cooking.
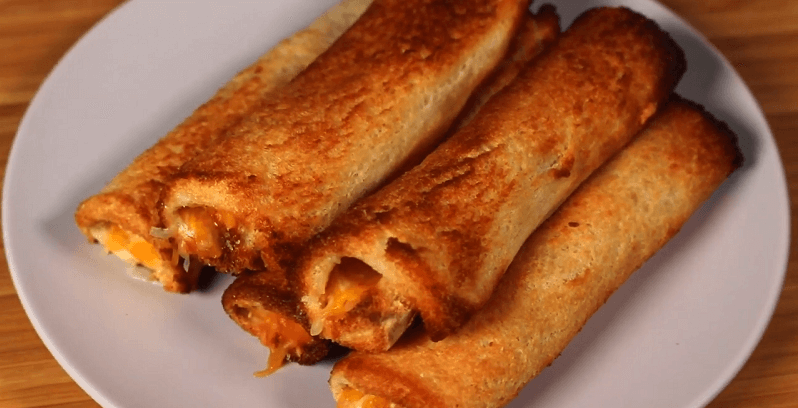
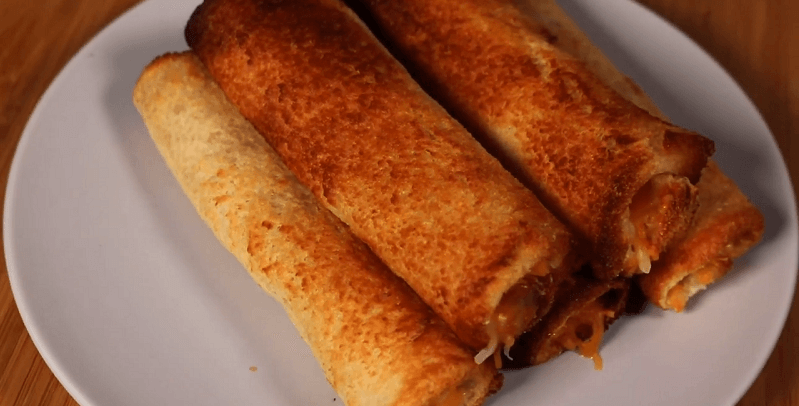
Step 6: Serve and Enjoy
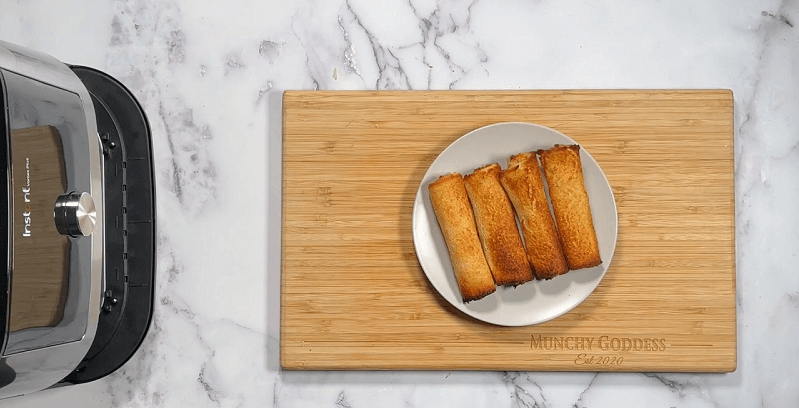
I serve these hot, often with a side of tomato soup or marinara sauce. They’re great on their own too, especially for kids. I slice them diagonally for a fun presentation. Trust me, they disappear fast!
Air Fryer Option
Sometimes, I switch things up with my air fryer. I preheat it to 390°F and place the rolls in a single layer. I cook them for about 2-3 minutes, checking halfway to ensure they don’t unroll. They come out extra crispy, perfect for dipping.
My Tips for the Best Roll-Ups
Over the years, I’ve learned a few tricks to make these Grilled Cheese Roll-Ups stand out. Fresh bread is non-negotiable—stale bread cracks and ruins the roll. If you’re using shredded cheese, don’t overfill, or it’ll ooze out too much.
Cook on low-medium heat for even browning. I’ve burned a few rolls by rushing with high heat, and it’s not pretty. If you’re adding meats, pre-cook them fully—raw bacon won’t crisp up inside the roll. Brushing butter directly on the rolls, rather than melting it in the pan, gives better control and less burning.
For air fryer fans, spritz the rolls with a tiny bit of oil if you want to cut down on butter. It still crisps up nicely. And don’t skip the seam-side-down trick—it’s a game-changer for keeping rolls intact.
Variations I’ve Tried
I love experimenting with these roll-ups. Here are a few twists I’ve played with that you might enjoy. They’re super customizable, so feel free to make them your own.
- Tomato and Basil: I add diced tomatoes and a pinch of fresh basil before rolling. The tomatoes add a fresh, juicy pop. Pair with marinara for a pizza-like vibe.
- Spicy Kick: I swap cheddar for pepper jack and add a thin slice of jalapeño. It’s got just the right heat. Perfect for my spice-loving friends.
- Creamy Twist: I spread a thin layer of cream cheese mixed with Italian seasoning before adding cheddar. It makes the rolls extra rich. Provolone or mozzarella works great here too.
- Monte Cristo Style: I add a slice of ham and a sprinkle of powdered sugar after cooking. It’s a sweet-savory combo that’s always a hit. Serve with raspberry jam for dipping.
Storing and Reheating
I rarely have leftovers, but when I do, I store them right. Place cooled roll-ups in an airtight container or zip-top bag. They keep in the fridge for up to 3 days. For longer storage, I freeze them on a baking sheet, then transfer to a freezer bag for up to 3 months.
To reheat, I avoid the microwave—it makes them soggy. Instead, I pop them in a 350°F oven or toaster oven for 5-7 minutes. A quick pan-fry on low heat works too. The bread crisps back up, and the cheese gets gooey again.
Nutritional Breakdown
I’m no dietitian, but I like to know what I’m eating. Here’s a rough estimate for one roll-up, based on my recipe. It varies by ingredients, so double-check if you’re counting calories.
| Nutrient | Amount per Roll-Up |
| Calories | ~200 kcal |
| Carbohydrates | 14g |
| Protein | 8g |
| Fat | 12g |
| Saturated Fat | 7g |
| Cholesterol | 30mg |
| Sodium | 400mg |
| Calcium | 200mg |
This is based on white bread, cheddar, and butter. Add-ins like bacon or turkey will bump up the protein and fat. If you need precision, run the ingredients through a nutrition calculator.

Why These Are Perfect for Any Occasion
I’ve served these at game nights, kids’ parties, and even as a quick weeknight dinner. They’re a hit because they’re easy to eat and fun to dip. I’ve seen picky eaters devour them without complaint. They’re also budget-friendly, using pantry staples I always have on hand.
For bigger crowds, I double the recipe and cook in batches. I keep the first batch warm in a low oven (200°F) while finishing the rest. Pair them with a variety of dips—ranch, BBQ, or even a spicy aioli—to keep things interesting. They’re always a conversation starter.
Pairing Ideas
I’m all about making these roll-ups part of a bigger spread. Tomato soup is the classic pairing, but I’ve got other ideas too. A fresh fruit salad adds a light, sweet contrast. Cucumber slices or carrot sticks bring some crunch without overpowering the meal.
For dips, I love marinara with a sprinkle of fresh basil. Ranch dressing is a crowd favorite, especially with kids. If I’m feeling fancy, I whip up a quick garlic aioli. These rolls are so versatile, they work with almost anything.
My Journey with This Recipe
I’ve been making these for years, tweaking them along the way. My first batch was a mess—too much cheese, bread too thick, and a pan too hot. But I learned fast. Now, I can whip them up without thinking, and they’re a staple in my kitchen.
I’ve shared them with friends at potlucks, and they always ask for the recipe. My kids love helping roll the bread, which makes it a fun family activity. It’s amazing how something so simple can bring so much joy.
Troubleshooting Common Issues
Sometimes things go wrong, but I’ve got you covered. If your bread cracks, it’s likely too stale—use fresh bread next time. If rolls unravel, you didn’t roll tightly enough or skipped the seam-side-down step. Secure with a toothpick if needed.
If the cheese leaks out, you might’ve overfilled or cooked on too high heat. Use less cheese and keep the heat low-medium. If they’re soggy, you didn’t cook long enough or used too much butter. Aim for a crisp, golden finish.
Frequently Asked Questions
Can I use whole wheat bread instead of white?
Yes, but choose a soft variety. Stiffer breads like sourdough don’t roll well. Whole wheat adds a nutty flavor but may be less pliable.
What cheeses work best for roll-ups?
Cheddar and American are my go-tos for their meltability. Provolone, mozzarella, or Swiss are great too. Avoid hard cheeses like Parmesan—they don’t melt smoothly.
Can I make these ahead of time?
Absolutely. Assemble the rolls, wrap tightly in plastic, and refrigerate for up to 2 days. Brush with butter and cook when ready.
How do I keep them crispy when reheating?
Reheat in an oven or toaster oven at 350°F for 5-7 minutes. A skillet on low heat works too. Avoid the microwave—it makes them soggy.
Can I freeze Grilled Cheese Roll-Ups?
Yes, freeze on a baking sheet, then store in a freezer bag for up to 3 months. Reheat in an oven for best results.
What dips pair well with these?
Tomato soup or marinara are classics. I also love ranch, BBQ sauce, or a garlic aioli for variety.

Grilled Cheese Roll-Ups Recipe
Ingredients
- 2 slices white or sandwich bread
- 2 slices cheddar cheese (or any preferred melting cheese)
- 1 tbsp butter (softened)
Notes
- Trim crusts off the bread slices.
- Flatten each slice with a rolling pin or your palm.
- Place a slice of cheese on each flattened bread piece.
- Roll tightly and seal edges by pressing gently.
- Heat a skillet over medium heat and melt butter.
- Place roll-ups seam-side down and cook, turning until all sides are golden brown and crispy (about 4–5 minutes).

Hello! I am a seasoned culinary veteran whose passion for cooking began in my family kitchen and later I explored global cuisines. Now as a owner of the "OhMyRecipe" blog, I share my expertise by blending classic techniques with innovative twists. I advocates for culinary education and community engagement, making cooking accessible and enjoyable for all. Join me on a flavor-filled journey of delicious dishes and culinary inspiration.